
StorMagic SvSAN installation on VMware
In this article, we would like to present the Software Defined Storage Solution from StorMagic on a VMware vSphere 6.0 system and provide the instructions for a possible installation. With SvSAN, you have the possibility to create a high-availability shared storage from the local RAIDs of the server to use, for example, vSphere HA, vMotion or Distributed Ressource Scheduler (DRS).
Prerequisites
SvSAN can be used on VMware vSphere and Microsoft Hyper-V systems.[1][2] A vSphere- / Hyper-V certified system with a Hardware RAID Controller is a hardware prerequisite ( Avago MegaRAID Controller preferred). The systems, that were released by us, can be found in StorMagic Virtual Storage Systemen.
At least, two servers with local storage are required. The additional Neutral Storage Host (NSH) can be provided on a physical client or as Virtual Appliance. The Virtual Appliance can not be operated on one of the Stormagic server if there are less than SvSAN hosts.
The NSH is a Quorum service between the hosts if they can not communicate anymore due to technical problems. Due to a loss of connection between the hosts, it comes to a so-called split-brain scenario. In this case, the host can not determine the current state of the other and writes independently of each other data on the reflected storage. This can lead to inconsistency or to a complete data loss in the worst case.
If SvSAN is provided without NSH, Stormagic recommends a redundant connection of the SvSAN VMs (Management and iSCSI).


Test environment
This article describes the installation of SvSAN on a VMware vSphere system with crossover configuration. By connecting the 10Gb/s interfaces directly, the costs for an additional switch can be safed. If other hosts can, however, access the iSCSI target, the connection must be configured over a switch. The configurations on vSphere host have been performed in vSphere client. The installation with the vSphere Web client is also possible.
The SvSAN basic installation is performed without NSH. The NSH can be added as Windows service or virtual appliance later. A respective example can be also found in this article.
For this article, the following hardware and software was used:
- Supermicro X10DRi mainboard
- Avago MegaRAID 9361-8i RAID controller
- Intel X540 10Gb/s RJ45 network card
- Thomas-Krenn vSphere 6 Hypervisor ISO
- vCenter Server 6 update 2 (Appliance)
- StorMagic 5.3update 1
vSphere host configuration
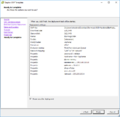
In this example, both hosts have an additional SSD for a hypervisor and the vCenter server installation. On both hosts, the Thomas-Krenn vSphere 6 Hypervisor ISO has been installed and the vCenter server 6 appliance has been provided. Two new standard virtual switches are created per host, each with one VMkernel port and one port group for virtual machines. vSwitch0 is added to the second 1Gb/s onboard network interface. vSwitch1 and vSwitch2 are configured with a 10Gb/s network interface each. The Maximum Transmission Unit (MTU) is increased on Jumbo Frames (9000) for vSwitch1, vSwitch2 and the VMKernel ports in this example.
Hint: If you do not use a crossover configuration of the 10Gb/s network interfaces, the Jumbo Frames must be configured on the physical switch at the corresponding ports.
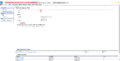
Finally, a iSCSI software adapter must be added to every host and the SSH access must be activated.
-
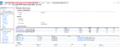
 The iSCSI connection and the Management Network are configured redundantly without NSH
 -
 Change the MTU to Jumbo Frames (9000) in the switch settings
 -
 Change the MTU on the VMkernel (iSCSI) port
 -
 Add a iSCSI software adapter to every host


Installation of SvSAN plugin
vCenter Server Appliance
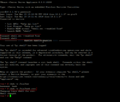
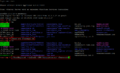
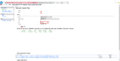
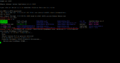
To install the plugin on the vCenter Server Appliance, the SSH application and the Bash-shell must be activated. You can activate both on the configuration page of the vCenter Appliance or change the login-shell via SSH permanently. The plugin was copied to the /tmp directory of the vCenter Appliance using WinSCP, made executable with chmod and installed. For the installation, you have to state the SSO administrator including the password.
Verify, if the plugins are activated correctly.
Hint: If the NSH should be installed on the vCenter Server Appliance, please note the following point: NSH Installation on vCenter Server Appliance.
-
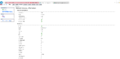
 Log in as root at the vCenter configuration page
 -
 Under "access", you can activate the SSH access and the Bash-shell temporarily
 -
 You can also activate the Bash-shell via SSH and configure permanently as login shell
 -
 Install SvSAN plugin
 -
 Verify in the vSphere client if the plugin is active


vCenter Server Windows
Start the StorMagic.msi installer as administrator in the Windows version. Select Custom Installation if you do not want to install the NSH service. After the installation has been completed, the plugin in the vSphere Client and in the vSphere Web Client are available.


Provide and configure SvSAN VM
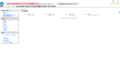
The provision of the SvSAN VMs (VSAs) functions quite intuitively via the vSphere client and via web client. When configuring the network, pay attention to the traffic types of the individual networks. The previously created virtual switches are recognized automatically. In this example, the local unpartitioned raid was added as RDM device. This step can also be skipped if necessary.
Providing SvSAN
-
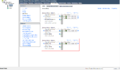
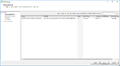
 The provision can be started under "StorMagic" on datacenter level
 -
 Confirm by clicking "continue"
 -
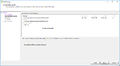
 Select a host and enter the root password
 -
 Confirm the license agreement
 -
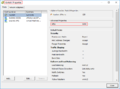
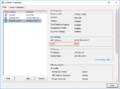
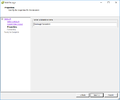
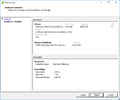
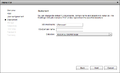 The name and the storage location of the VSA can be configured
 -
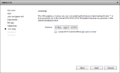
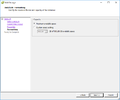
 State the unpartitioned local raid, so that it can be added to a pool
 -
 Configure the traffic for every network
 -
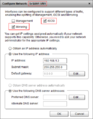 Only select iSCSI & Mirroring for the iSCSI networks
 -
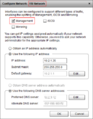 Only select Management for VM network
 -
 Enter the license key. This step can also be skipped
 -
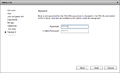 Enter a password for the admin access of the websurface
 -
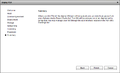 Confirm the provision with "Finish"


Configure iSCSI Initiator and MTU
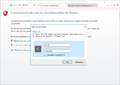
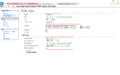
After provisioning the VSAs, you can enter the corresponding IP addresses in the dynamic detection of the iSCSI adapters on both vSphere hosts. However, do not perform a rescan at this point, as the target has not been configured yet. Then log in to the web interface and change the MTU for both 10Gb/s network interfaces if you use Jumbo Frames. Verify, if the credentials are deposited on both iSCSI initiators. In this example, there is no DNS entry deposited for the VSAs. Therefore, only the IP address is entered.
-
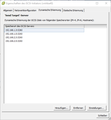 Enter the iSCSI IP addresses of the VSAs in the adapter settings in the vSphere client. Do not perform a rescan!
 -
 Log in to the SvSAN web interface as admin.
 -
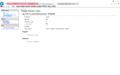
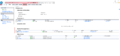
 The most important status messages can be found in the home overview
 -
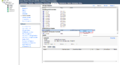
 Check whether the ESXi login details are stored in the iSCSI initiators.
 -
 Select an initiator. The settings can be changed under "Edit Initiator"
 -
 Enter the IP address of the host if no DNS entry is available. Confirm the login data with "Apply"
 -
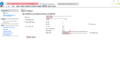
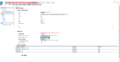
 Under network, the MTU of the network interfaces can be verified.
 -
 Select a 10Gb/s interface. Under "Edit", the settings can be changed
 -
 Change the MTU to 9000 and confirm with "Apply"


Network speedtest
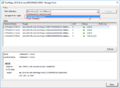
With the speedtest, you can verify if there is a connection between the hosts and if there are problems with the network speed. On the first host, start the server service on an interface, then select an interface on the second host, enter the desired data size, and start the client service.
-
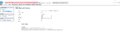
 A speedtest can be performed under network to verify the connection
 -
 Select an interface on the first host and start it as server
 -
 For the second server, also select an interface, the target IP address, the size, and start it as a client.


Create datastore
When the VSAs are installed and the IP-settings are terminated on the iSCSI software adapters of the vSphere hosts, the shared datastore can be created. A datastore can be created directly in the vSphere client or in the VSA websurface. In this example, we show which steps are necessary in the websurface.
-
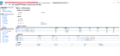
 A datastore can be created in the websurface under "Targets -> Create"
 -
 Select the capacity, add both iSCSI initiators and select the "Mirroring" option. Confirm with "Create"
 -
 Execute a rescan on the vSphere hosts of the iSCSI software adapter
 -
 Open the path options of the target
 -
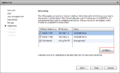
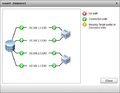
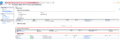
 In this example, the "Round Robin" path option is selected and all paths are therefore active
 -
 Select under "Configuration -> Storage -> Add Storage"
 -
 Confirm the Storgage Type "Disk/LUN" and click on "Next"
 -
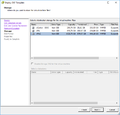
 The reflected SvSAN datastore is displayed. Confirm it and click on "Next"
 -
 Confirm the partition overview with "Next"
 -
 Select a name for the datastore
 -
 Configure the desired capacity
 -
 Confirm the overview with "Finish"
 -
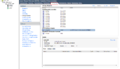
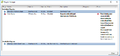
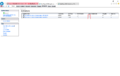
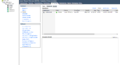
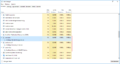
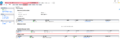
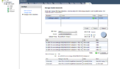 Under "Datacenter -> StorMagic -> Manage shared datastores", the state of the datastore can be verified
 -
 Overview of all datastore-paths


NSH Installation
A NSH[3] can be added later. For the provision, a virtual appliance, a Windows service and a Debian 32bit package are offered. In this example, we show how to provide the virtual appliance and the Windows service in the same subnet.
Installation of NSH Windows service
The NSH service can be installed on the well-known Windows versions (Windows 7 / 8, Server 2008(R2) / Server 2012(R2)). The installation can be performed in just a few steps and the NSH service runs in the background. In this article, the service has been installed on a Windows 10 client-system in the same subnet. If the NSH is located in the same subnet, it is automatically recognized in the SvSAN websurface.
-
 Start setup.exe
 -
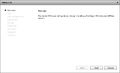
 Click on "Next"
 -
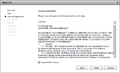
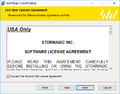 Accept the license agreement and click on "Next"
 -
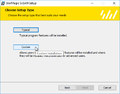 Select "Custom" option
 -
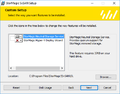 Remove the Hyper-V option and click on "Next"
 -
 Start the installation with "Install"
 -
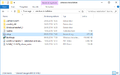
 In the taskmanager, you can verify if the StorMagic services are running
 -
 The NSH is recognized automatically in the webinterface
 -
 Change the "Isolation Policy" to "Majority", enter the NSH and confirm with "Edit"


Installation of NSH appliance
The NSH appliance can not be provided on a stand-alone vSphere host, as the host must be administrated by a vCenter server. In this article, an additional host has been added, on which the appliance will be provided. It is not necessary to operate the additional host in the same cluster. It can be added as single host to the vCenter.
-
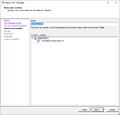
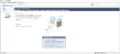 Add an OVF template
 -
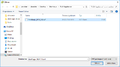 Select the StorMagic OVF Template
 -
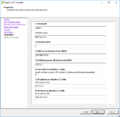
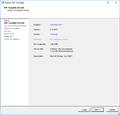 Confirm the template details with "Next"
 -
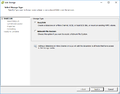
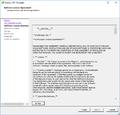 Accept the license agreement with "Accept" and click on "Next"
 -
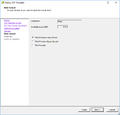
 Enter a name for the NSH appliance
 -
 Select a storage place for the appliance
 -
 Choose a hard drive format
 -
 Assign an IP address or select the DHCP option.
 -
 Confirm the overview with "Finish"
 -
 The NSH appliance is also recognized automatically if it is located in the same subnet
 -
 Change the "Isolation Policy" to "Majority", enter the NSH and confirm with "Edit"


NSH Installation on vCenter Server Appliance
The NSH can also be installed directly on the vCenter Server Appliance. If the vCenter Server Appliance is operated on the SvSAN Cluster, three hosts are recommended at least.
-
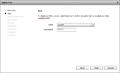
 State the SSO administrator and the SSO password during the installation
 -
 The SH service is also recognized automatically on the vCenter if it is located in the same subnet
 -
 Change the "Isolation Policy" to "Majority", enter the NSH and confirm with "Edit"


References
- ↑ VMware Virtual SAN (www.stormagic.com)
- ↑ Hyper-V Virtual SAN (www.stormagic.com)
- ↑ SvSAN NSH FAQ (www.stormagic.com)
More information
- SvSAN: Simple, most cost-effective virtual SAN (www.stormagic.com)
Author: Sebastian Köbke
 |
Translator: Alina Ranzinger Alina has been working at Thomas-Krenn.AG since 2024. After her training as multilingual business assistant, she got her job as assistant of the Product Management and is responsible for the translation of texts and for the organisation of the department.
|