Please note that this article / this category refers either on older software / hardware components or is no longer maintained for other reasons. This page is no longer updated and is purely for reference purposes still here in the archive available.
The Intel Data Center Manager is a power and temperature management solution for data centers. For Linux-based operating systems, the Intel DCM is installed console-based via a shell script. This article shows the installation of the Intel Data Center Manager version 3.6 under Ubuntu 18.04 LTS.
The console-based installation under Linux-based operating systems succeeds with the following steps, in this example under Ubuntu 18.04 LTS. These instructions also apply to all other compatible Linux-based operating systems:
Download the current version, e.g. for version 3.6: wget 'https://downloadmirror.intel.com/28894/eng/Intel(R)_Data_Center_Manager64.tar.gz'
Extract the tar.gz archive: tar -xvzf 'Intel(R)_Data_Center_Manager64.tar.gz'
Change to the folder: cd dcm64_package
Make the shell script executable: chmod +x Intel(R)_Data_Center_Manager64.sh
Executing the script
Execute the script and confirm the EULA:
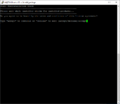
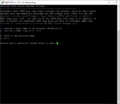
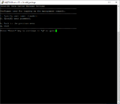
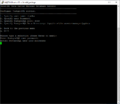
Run the installation script with root privileges.
Welcome message with an overview of the installation steps. Press Enter.
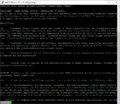
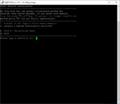
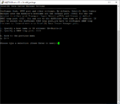
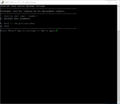
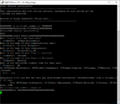
Read through the EULA and scroll down with "Enter".
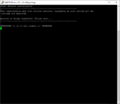
You must accept the EULA to proceed.
If you agree, type "accept" and confirm with Enter.
Select installation directory
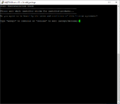
The installation directory can be chosen by the user:
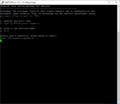
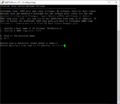
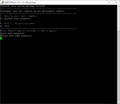
			You can install the Intel DCM in the default installation directory or in a directory of your choice.


			Select the desired installation directory and confirm with Enter.


			Confirm with Enter.
Set configuration options
Geben Sie in den folgenden Schritten die erforderlichen Daten zur Installation an:
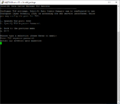
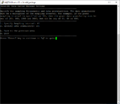
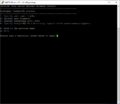
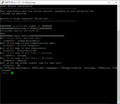
Enter a Password for the TLS Keystore. Then press Enter.
Reenter the password. Confirm with Enter.
You can now configure a hostname or IP address.
Type "1" and then Enter.
Enter the hostname or an IP address. Confirm with Enter.
The desired hostname or IP address is now stored. Press Enter to continue.
You can define the two parameters Sampling Frequency and Data Granularity. Confirm with Enter.
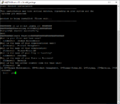
Now the Administrator user is defined. The user name and password can be changed.
Type "2" to change the password and then Enter.
Enter a new password for the user, confirm with Enter and then a new password and confirm again with Enter.
You reach the next configuration step with Enter.
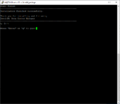
Here the configuration of the PostgreSQL database will be done. Confirm with Enter.
You are prompted to enter a new password for the PostgreSQL user. Confirm the entry with Enter and repeat the entry and confirm afterwards with Enter.
Now the configuration before the actual installation of the Intel DCM is completed, confirm with Enter.
Installation is in progress
Now the installation of the Intel Data Center Manager is carried out:
			The installation is now started.


			You are asked for some information for the TLS certificate. Specify these and confirm each entry with Enter.


			Confirm the concluding question with "yes" and Enter.


			The TLS certificate is generated.


			The Installation is now completed, you can now close the dialog with Enter.
Further configuration in the web browser
Once the console-based installation is complete, switch to a web browser of your choice to further configure the Intel Data Center Manager:
The web interface of the Intel Data Center Manager can be reached via https://[IP address]]:8643.
Note about CentOS: Because the firewall of CentOS blocks this port by default, log in as root user on the system where Intel Data Center Manager is installed and execute the following commands. This will permanently add port 8643 to the Public zone:
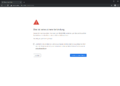
When using internal certificates there is a warning, confirm the exception under Advanced.
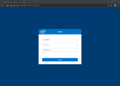
Log in with the previously configured user name and password.
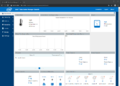
The dashboard of the DCM is loaded.
Installation under Windows 2019
The installation under Windows operating systems is carried out in a similar way, instead of the console-based installer, the installation is carried out using a graphical installer.
Detailed instructions for installing Intel DCM under Windows can be found in the DCM Console User Guide in section "Installing DCM Console" on page 5.
Uninstallation
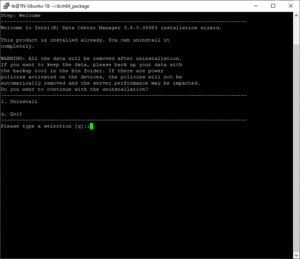
An installation of the Intel Data Center Manager can be removed as follows:
Call the script in the identical and currently installed version of the Intel DCM.
sudo ./Intel(R)_Data_Center_Manager64.sh
The installation script then only offers to uninstall DCM.
Thomas Niedermeier working in the product management team at Thomas-Krenn, completed his bachelor's degree in business informatics at the Deggendorf University of Applied Sciences. Since 2013 Thomas is employed at Thomas-Krenn and takes care of OPNsense firewalls, the Thomas-Krenn-Wiki and firmware security updates.

 Run the installation script with root privileges.
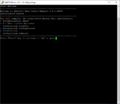 Welcome message with an overview of the installation steps. Press Enter.
 Read through the EULA and scroll down with "Enter".
 You must accept the EULA to proceed.
 If you agree, type "accept" and confirm with Enter.


 You can install the Intel DCM in the default installation directory or in a directory of your choice.
 Select the desired installation directory and confirm with Enter.
 Confirm with Enter.


 Enter a Password for the TLS Keystore. Then press Enter.
 Reenter the password. Confirm with Enter.
 You can now configure a hostname or IP address.
 Type "1" and then Enter.
 Enter the hostname or an IP address. Confirm with Enter.
 The desired hostname or IP address is now stored. Press Enter to continue.
 You can define the two parameters Sampling Frequency and Data Granularity. Confirm with Enter.
 Now the Administrator user is defined. The user name and password can be changed.
 Type "2" to change the password and then Enter.
 Enter a new password for the user, confirm with Enter and then a new password and confirm again with Enter.
 You reach the next configuration step with Enter.
 Here the configuration of the PostgreSQL database will be done. Confirm with Enter.
 You are prompted to enter a new password for the PostgreSQL user. Confirm the entry with Enter and repeat the entry and confirm afterwards with Enter.
 Now the configuration before the actual installation of the Intel DCM is completed, confirm with Enter.


 The installation is now started.
 You are asked for some information for the TLS certificate. Specify these and confirm each entry with Enter.
 Confirm the concluding question with "yes" and Enter.
 The TLS certificate is generated.
 The Installation is now completed, you can now close the dialog with Enter.


 When using internal certificates there is a warning, confirm the exception under Advanced.
 Log in with the previously configured user name and password.
 The dashboard of the DCM is loaded.