Updating the BIOS of a Supermicro X9SCM-F Motherboard
In this articles, we will show you how to perform a BIOS Update for a Supermicro X9SCM-F Mainboard. See Updating from BIOS Version 1.1a to BIOS Version 2.0a in the following example.
Note when using Ubuntu 12.04 LTS: when updating a BIOS from BIOS version 1.* to 2.*, the UEFI boot records will be lost. You can find information about their restoration in the article, Restoring Ubuntu UEFI boot records after a BIOS update.
Description
Perform the following steps to update the BIOS (status as of BIOS version 2.0a, translated from the supplied ReadMe file):
- Save the BIOS files on your computer.
- Unpack the files to a device capable of booting DOS (such as a USB stick).
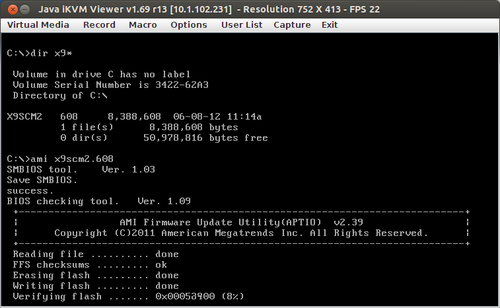
- Start the DOS prompt and execute the command
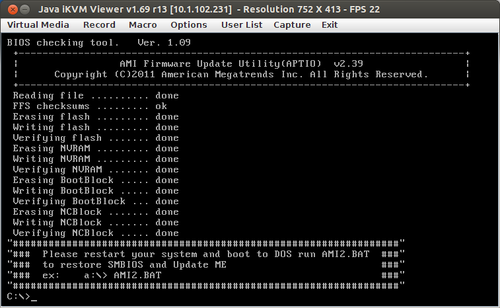
AMI.BAT filename.xxx(for example,AMI.BAT X9SCM2.608): - Let the update process run and do not interrupt it. After the update process has completed, you will see the following message:
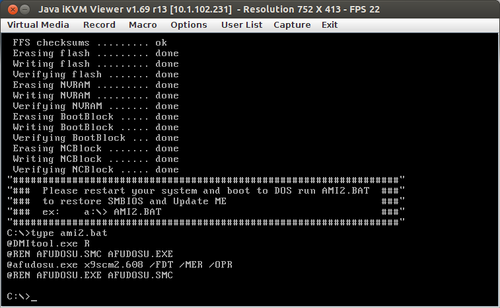
- You can view the contents of ami2.bat with the following command:
type ami2.bat: - Press [Ctrl]+[Alt]+[Del] to restart the computer. If you have connected through the IPMI Remote Console, you can execute this key combination from the Macros menu item. The server will then shut down, restart after a few seconds, shut down again and then restart as usual.
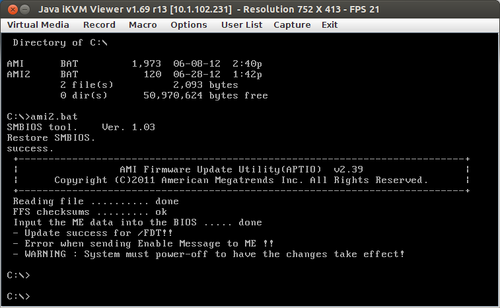
- At the DOS prompt, execute the command,
ami2.bat: - After the BIOS has successfully been updated, disconnect the power from the server by pulling the cable. Delete the CMOS settings (by short-circuiting the JBT1 pin on the main board, with a small screwdriver for example). Reconnect the power and start the server.
- Open the BIOS settings screen. Press F3 to load the default settings, then F4 to save them. In this manner, you can reset the BIOS settings to their default settings, as needed.
Note: If the error message Error when sending Enable Message to ME occurs in step 7, do another BIOS update to version 2.0a using the BIOS image provided in the following Wiki article: Fix X9SCM-F BIOS update failure Error when sending Enable Message to ME.


