
SvSAN Software Upgrade
In this article, we show how to perform a software upgrade from StorMagic SvSAN. We use the upgrade from SvSAN version 5.3.3474 to version 6.0.3486 as an example.
Deinstallation of StorMagic SvSAN plugin
As there is no direct upgrade function at SvSAN, you first have to deinstall the old version and install the new version afterwards. This can be made during ongoing operations and it is not necessary to put the hosts into maintenance mode. Before you deinstall the old version, make sure that all targets are synchronized and available via all paths.
vCenter Server Appliance
Log in to the vCenter Server Appliance (vCSA) as root, navigate to the /opt/stormagic/bin/ directory, and run the uninstaller.sh script with the following command:
./uninstaller.sh --remove <SSO Administrator> <SSO Administrator Passwort>
-
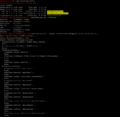 Execute the uninstaller.sh script. To do this, you must specify the SSO administrator and password.

vCenter Server Windows
For the Windows version of vCenter Server, you must deinstall the SvSAN software with local administrator rights under Control Panel -> Programs and Features.
-
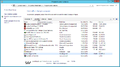 Under"programs and features", you can deinstall SvSAN
 -
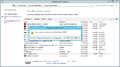 Confirm the deinstallation


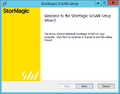
Installation of StorMagic SvSAN plugin
After the old version has been deinstalled, you can install the new version. This step is also possible without maintenance mode and does not need any reboot. After SvSAN has been installed, the plugin in the vSphere client and vSphere Web client is available.
vCenter Server Appliance
Copy the new SvSAN installation script on the vCSA. Then log in to the vCSA as root via SSH, navigate to the directory containing the installation script, and make it executable with chmod +x StorMagic.sh. Enter the following command to install:
./StorMagic.sh --install <SSO Administrator> <SSO Administrator Passwort>
-
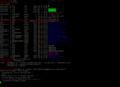 Make the script executable and install SvSAN as an SSO administrator, including a password.
 -
 Check that the correct version is installed and displayed.


vCenter Server Windows
Start StorMagic.msi installer as administrator in the Windows version. Select Custom Installation if you do not want to install the NSH service. After the installation has been completed, the plugin is available in the vSphere client and vSphere Web client.
-
 Select "Next"
 -
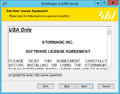 Confirm license agreements
 -
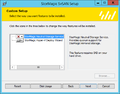
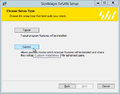 Select Custom Installation if you do not want to install the NSH service
 -
 Deactivate NSH installation
 -
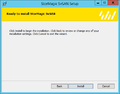 Confirm with Install
 -
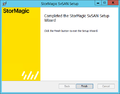 The installation is concluded


VSA Firmware Upgrade
You can perform the firmware upgrade during ongoing operations. However, a restart of the VSA is required.
Hint: After upgrading the first VSA, wait for the hosts to resynchronize before starting the upgrade on the second VSA.
-
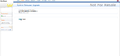
 In the VSA web interface, go to the “System” menu item and select “Upgrade Firmware.”
 -
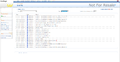
 Upload the new firmware. You can also choose to automatically restart after the upgrade.
 -
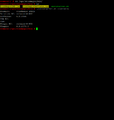
 You can check the upgrade in the event log.
 -
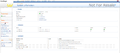
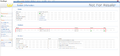 Overview of the current firmware


Author: Sebastian Köbke
 |
Translator: Alina Ranzinger Alina has been working at Thomas-Krenn.AG since 2024. After her training as multilingual business assistant, she got her job as assistant of the Product Management and is responsible for the translation of texts and for the organisation of the department.
|