

 wiki
wikiRemove a Proxmox node from the cluster and add it again
This article shows how to remove a node from a Proxmox Ceph cluster and, if necessary, add it back.
Requirements
- There must be no VMs or containers on the node to be removed. Therefore, it is recommended that you migrate them to another node beforehand (see the "Preparation" section for more information).
- Please note that your cluster has enough free storage space to distribute the data onto the remaining nodes
Preparations
Migration of VMs & containers
Migrate all virtual machines and containers on any server.
-
![Right-click the VM or container, then click [Migrate].](//www.thomas-krenn.com/de/wikiDE/images/thumb/4/49/1_Migrate.png/91px-1_Migrate.png) Right-click the VM or container, then click [Migrate].
Right-click the VM or container, then click [Migrate]. -
![Alternatively, you can also use the [Bulk Migrate] by right clicking on the node to migrate several at once.](//www.thomas-krenn.com/de/wikiDE/images/thumb/2/20/Bulk_Migrate.png/78px-Bulk_Migrate.png) Alternatively, you can also use the [Bulk Migrate] by right clicking on the node to migrate several at once.
Alternatively, you can also use the [Bulk Migrate] by right clicking on the node to migrate several at once. -
 In this window, select the node to which the VM or CT should be migrated.
 -
![In the following, click on [Migrate].](//www.thomas-krenn.com/de/wikiDE/images/thumb/3/39/3_Migrate.png/120px-3_Migrate.png) In the following, click on [Migrate].
In the following, click on [Migrate]. -
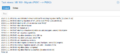 The VM is migrated to the selected node.
 -
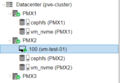 The VM/CT is now assigned in the overview to another node. Repeat this procedure until all VMs and containers are migrated.
![Right-click the VM or container, then click [Migrate].](/en/wiki/File:1_Migrate.png)
![Alternatively, you can also use the [Bulk Migrate] by right clicking on the node to migrate several at once.](/en/wiki/File:Bulk_Migrate.png)

![In the following, click on [Migrate].](/en/wiki/File:3_Migrate.png)


Delete OSDs
-
![Select [Ceph] --> [OSD]](//www.thomas-krenn.com/de/wikiDE/images/thumb/a/a6/1_OSD_l%C3%B6schen.png/120px-1_OSD_l%C3%B6schen.png) Select [Ceph] --> [OSD]
Select [Ceph] --> [OSD] -
![Select an OSD of the node and click in the upper right corner on [Out].](//www.thomas-krenn.com/de/wikiDE/images/thumb/f/f2/2_OSD_l%C3%B6schen.png/120px-2_OSD_l%C3%B6schen.png) Select an OSD of the node and click in the upper right corner on [Out].
Select an OSD of the node and click in the upper right corner on [Out]. -
![In the following, select the same OSD and click on [Stop] this time.](//www.thomas-krenn.com/de/wikiDE/images/thumb/9/9c/3_OSD_l%C3%B6schen.png/120px-3_OSD_l%C3%B6schen.png) In the following, select the same OSD and click on [Stop] this time.
In the following, select the same OSD and click on [Stop] this time. -
 The OSD should now be displayed as down/out.
 -
![Now select the OSD again and choose [More] --> [Destroy] --> [Remove]. This will completely delete the OSD. Repeat this process for the remaining OSDs.](//www.thomas-krenn.com/de/wikiDE/images/thumb/6/6c/5_OSD_l%C3%B6schen.png/120px-5_OSD_l%C3%B6schen.png) Now select the OSD again and choose [More] --> [Destroy] --> [Remove]. This will completely delete the OSD. Repeat this process for the remaining OSDs.
Now select the OSD again and choose [More] --> [Destroy] --> [Remove]. This will completely delete the OSD. Repeat this process for the remaining OSDs. -
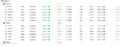 After deleting the OSDs, the desired node should look like this.
![Select [Ceph] --> [OSD]](/en/wiki/File:1_OSD_l%C3%B6schen.png)
![Select an OSD of the node and click in the upper right corner on [Out].](/en/wiki/File:2_OSD_l%C3%B6schen.png)
![In the following, select the same OSD and click on [Stop] this time.](/en/wiki/File:3_OSD_l%C3%B6schen.png)

![Now select the OSD again and choose [More] --> [Destroy] --> [Remove]. This will completely delete the OSD. Repeat this process for the remaining OSDs.](/en/wiki/File:5_OSD_l%C3%B6schen.png)

Delete Monitor, Manager, MetaDataServer Daemons
To avoid later complications when creating different daemons, it is recommended to delete it before the node is removed. Please follow these steps:
-
![In the overview, click on [Ceph] --> [Monitor] and select the monitor that should be deleted. Next, click on [Destroy].](//www.thomas-krenn.com/de/wikiDE/images/thumb/3/32/Proxmox_Monitor_l%C3%B6schen.png/120px-Proxmox_Monitor_l%C3%B6schen.png) In the overview, click on [Ceph] --> [Monitor] and select the monitor that should be deleted. Next, click on [Destroy].
In the overview, click on [Ceph] --> [Monitor] and select the monitor that should be deleted. Next, click on [Destroy]. -
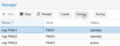 Follow the same order for the managers as well.
 -
![In the websurface, click on [Ceph] --> [CephFS] and select the MetaDataServer. Next, click on [Destroy].](//www.thomas-krenn.com/de/wikiDE/images/thumb/b/be/Proxmox_MetaDataServer_l%C3%B6schen.png/120px-Proxmox_MetaDataServer_l%C3%B6schen.png) In the websurface, click on [Ceph] --> [CephFS] and select the MetaDataServer. Next, click on [Destroy].
In the websurface, click on [Ceph] --> [CephFS] and select the MetaDataServer. Next, click on [Destroy].
![In the overview, click on [Ceph] --> [Monitor] and select the monitor that should be deleted. Next, click on [Destroy].](/en/wiki/File:Proxmox_Monitor_l%C3%B6schen.png)

![In the websurface, click on [Ceph] --> [CephFS] and select the MetaDataServer. Next, click on [Destroy].](/en/wiki/File:Proxmox_MetaDataServer_l%C3%B6schen.png)
Reading out name
Find the name of your node either in the GUI under the "Server View" or use these command in the CLI: "pvecm nodes".The name of the server is required in the following step.
root@PMX1:~# pvecm nodes

Membership information
----------------------
    Nodeid      Votes Name
         1          1 PMX1 (local)
         2          1 PMX2
         3          1 PMX3
Remove cluster node
First, connect using the IP address of another node to prevent the connection from being lost during removal. Next, you have to shut down the node that should be removed. Please make sure that the node does not turn back on (for example with Wake-On-LAN).
In the following, you can enter the following command to remove the node from the cluster. Use the CLI of any other node for that.
root@PMX2:~# pvecm delnode PMX1
Killing node 1
root@PMX2:~#
Reinstallation & configuration of node
Now, it is important to know that the node can not be simply added back to the cluster, as a complete reinstallation must be performed. However, the previous configuration can also be used. Please note that the same PVE version is used as in the cluster. If you want to use another hardware, make sure that it is identical with the hardware of the remaining cluster nodes.
Now, you can start the configuration of your new system. For this, the configuration of the network and the editing of the host entries is necessary. Helpful tips for the configuration can be found in the following documentation: Proxmox Dokumentation
Cluster Join
Next, the node can be readded to the cluster.
-
![Connect to the cluster that should be joined by the node and go to [Datacenter] --> [Cluster] and click on [Join Information].](//www.thomas-krenn.com/de/wikiDE/images/thumb/9/95/1_Proxmox_Cluster_join.png/120px-1_Proxmox_Cluster_join.png) Connect to the cluster that should be joined by the node and go to [Datacenter] --> [Cluster] and click on [Join Information].
Connect to the cluster that should be joined by the node and go to [Datacenter] --> [Cluster] and click on [Join Information]. -
![Here, you can copy the Join information with a click on [Copy Information]. After this, switch to the node that should be added.](//www.thomas-krenn.com/de/wikiDE/images/thumb/8/89/2_Proxmox_Cluster_join.png/120px-2_Proxmox_Cluster_join.png) Here, you can copy the Join information with a click on [Copy Information]. After this, switch to the node that should be added.
Here, you can copy the Join information with a click on [Copy Information]. After this, switch to the node that should be added. -
![Here, go to [Datacenter] --> [Cluster] and click on [Join Cluster].](//www.thomas-krenn.com/de/wikiDE/images/thumb/7/79/3_Proxmox_Cluster_join.png/120px-3_Proxmox_Cluster_join.png) Here, go to [Datacenter] --> [Cluster] and click on [Join Cluster].
Here, go to [Datacenter] --> [Cluster] and click on [Join Cluster]. -
![Under [Information], paste the Join information you copied earlier. You will also need the password and Link0 and Link1. These should be configured to match the cluster.](//www.thomas-krenn.com/de/wikiDE/images/thumb/d/d1/4_Proxmox_Cluster_join.png/120px-4_Proxmox_Cluster_join.png) Under [Information], paste the Join information you copied earlier. You will also need the password and Link0 and Link1. These should be configured to match the cluster.
Under [Information], paste the Join information you copied earlier. You will also need the password and Link0 and Link1. These should be configured to match the cluster. -
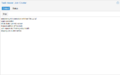 Now, the node is added to the cluster.
![Connect to the cluster that should be joined by the node and go to [Datacenter] --> [Cluster] and click on [Join Information].](/en/wiki/File:1_Proxmox_Cluster_join.png)
![Here, you can copy the Join information with a click on [Copy Information]. After this, switch to the node that should be added.](/en/wiki/File:2_Proxmox_Cluster_join.png)
![Here, go to [Datacenter] --> [Cluster] and click on [Join Cluster].](/en/wiki/File:3_Proxmox_Cluster_join.png)
![Under [Information], paste the Join information you copied earlier. You will also need the password and Link0 and Link1. These should be configured to match the cluster.](/en/wiki/File:4_Proxmox_Cluster_join.png)

Ceph installation and configuration
The last step for the integration of a node into the cluster is the installation and configuration of Ceph on the newly added server.
-
![Select the new node and click on [Ceph] and perform the installation.](//www.thomas-krenn.com/de/wikiDE/images/thumb/2/20/1_Ceph_Installation.png/120px-1_Ceph_Installation.png) Select the new node and click on [Ceph] and perform the installation.
Select the new node and click on [Ceph] and perform the installation. -
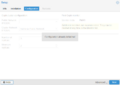 The configuration should be automatically applied to the other nodes.
 -
![Next, go to [Ceph] --> [Monitor] click [Create] and recreate the monitor.](//www.thomas-krenn.com/de/wikiDE/images/thumb/e/ee/3_Ceph_Installation.png/120px-3_Ceph_Installation.png) Next, go to [Ceph] --> [Monitor] click [Create] and recreate the monitor.
Next, go to [Ceph] --> [Monitor] click [Create] and recreate the monitor. -
![For the manager service, click on [Create].](//www.thomas-krenn.com/de/wikiDE/images/thumb/6/66/4_Ceph_Installation.png/120px-4_Ceph_Installation.png) For the manager service, click on [Create].
For the manager service, click on [Create]. -
![To recreate the MDS, select [Ceph] --> [CephFS] and click [Create].](//www.thomas-krenn.com/de/wikiDE/images/thumb/9/97/5_Ceph_Installation.png/120px-5_Ceph_Installation.png) To recreate the MDS, select [Ceph] --> [CephFS] and click [Create].
To recreate the MDS, select [Ceph] --> [CephFS] and click [Create]. -
![Finally, you must create the OSDs under [Ceph] --> [OSD]. You must use the same device class as you did for the other nodes.](//www.thomas-krenn.com/de/wikiDE/images/thumb/8/82/6_Ceph_Installation.png/120px-6_Ceph_Installation.png) Finally, you must create the OSDs under [Ceph] --> [OSD]. You must use the same device class as you did for the other nodes.
Finally, you must create the OSDs under [Ceph] --> [OSD]. You must use the same device class as you did for the other nodes. -
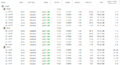 The OSDs after creating them.
 -
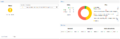 Ceph still needs some time to redistribute all the data. This may take a while.
 -
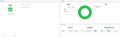 After a short wait, everything should be back to normal.
![Select the new node and click on [Ceph] and perform the installation.](/en/wiki/File:1_Ceph_Installation.png)

![Next, go to [Ceph] --> [Monitor] click [Create] and recreate the monitor.](/en/wiki/File:3_Ceph_Installation.png)
![For the manager service, click on [Create].](/en/wiki/File:4_Ceph_Installation.png)
![To recreate the MDS, select [Ceph] --> [CephFS] and click [Create].](/en/wiki/File:5_Ceph_Installation.png)
![Finally, you must create the OSDs under [Ceph] --> [OSD]. You must use the same device class as you did for the other nodes.](/en/wiki/File:6_Ceph_Installation.png)


 |
Author: Niklas Pauli Niklas Pauli works in the product management team at Thomas-Krenn. He completed his general university entrance qualification at Freyung High School and then his training as an IT specialist for system integration at Thomas-Krenn.AG. After completing his training, he continued to work in the areas of Proxmox VE incl. Ceph, backup (Proxmox, Veeam, SEP). He is also a regular writer for the Thomas-Krenn-Wiki.
|

 |
Translator: Alina Ranzinger Alina has been working at Thomas-Krenn.AG since 2024. After her training as multilingual business assistant, she got her job as assistant of the Product Management and is responsible for the translation of texts and for the organisation of the department.
|