
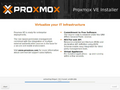
Install Proxmox VE
Proxmox VE is an open source virtualization platform for virtualizing Linux, Windows and BSD systems. The following article shows the installation of Proxmox VE 9.x on a server.
Prepare installation media

Use an empty USB stick for the installation. You can find information on how to create it in the following article:
Install Proxmox VE
The following screenshots show the installation of Proxmox VE 9.1.1:
-
 Plug the USB flash drive you have created into the server and switch it on.
 -
![Press [F2] or [Del] to enter the BIOS of the server.](//www.thomas-krenn.com/de/wikiDE/images/thumb/d/de/Proxmox-VE-9-Installation-00-Enter-Setup.png/120px-Proxmox-VE-9-Installation-00-Enter-Setup.png) Press [F2] or [Del] to enter the BIOS of the server.
Press [F2] or [Del] to enter the BIOS of the server. -
 Boot from the USB flash drive you created.
 -
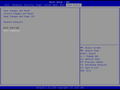
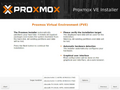
 Choose Install Proxmox VE.
 -
 (This screenshot shows the available entries when selecting Advanced Options.)
 -
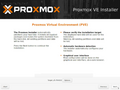
 Confirm the EULA by clicking on I agree.
 -
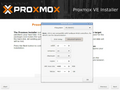
 The example system includes four storage devices (2x NVMe, 2x SATA SSD).
 -
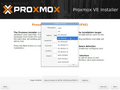 After clicking Options, you can select zfs (RAID1) as an alternative to ext4 on a volume.
 -
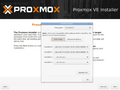 You can then select the two desired storage devices (2 SATA SSDs in this example).
 -
 Choosing Advanced Options, you can adjust additional settings.
 -
 Select the Installation target and click on Next.
 -
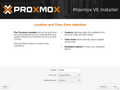 Select the Time zone and keyboard layout and click on Next.
 -
 Enter a password for the root user and your e-mail address and click on Next.
 -
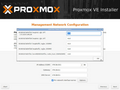
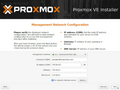
 Select the desired Network settings and click on Next.
 -
-
-
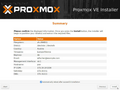 Check the Summary and click on Install.
 -
 The installation is in progress.
 -
 Remove the USB flash drive and click on Reboot.
![Press [F2] or [Del] to enter the BIOS of the server.](/en/wiki/File:Proxmox-VE-9-Installation-00-Enter-Setup.png)


First Start
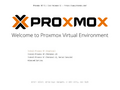
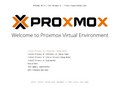
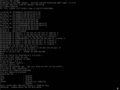
After the installation, the URL that takes you to the Promox VE web interface is displayed on the console:
-
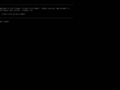 Display the URL for the Proxmox VE web interface.
 -
![To log in with a browser, navigate to https://[Promox-VE-IP]]:8006/.](//www.thomas-krenn.com/de/wikiDE/images/thumb/2/23/Proxmox-VE-9-Installation-19-Proxmox-VE-Login.png/120px-Proxmox-VE-9-Installation-19-Proxmox-VE-Login.png) To log in with a browser, navigate to https://[Promox-VE-IP]]:8006/.
To log in with a browser, navigate to https://[Promox-VE-IP]]:8006/. -
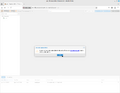 Information on subscriptions is displayed.
 -
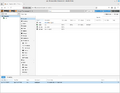 The server view appears.

![To log in with a browser, navigate to https://[Promox-VE-IP]]:8006/.](/en/wiki/File:Proxmox-VE-9-Installation-19-Proxmox-VE-Login.png)


 |
Author: Werner Fischer Werner Fischer, working in the Knowledge Transfer team at Thomas-Krenn, completed his studies of Computer and Media Security at FH Hagenberg in Austria. He is a regular speaker at many conferences like LinuxTag, OSMC, OSDC, LinuxCon, and author for various IT magazines. In his spare time he enjoys playing the piano and training for a good result at the annual Linz marathon relay.
|