

 wiki
wikiOnboard RAID on Supermicro X12 Motherboards
This article is about the topic Onboard RAID on X12 Supermicro Motherboards. It is explained how to create, administrate and delete a RAID in the BIOS. It also explains how Distributed PPL and Journaling Mode are used to counteract the RAID Write Hole.
Setup
In the following, it is explained how to create an Onboard RAID in the BIOS of your motherboard and which modes you need to be aware of.
Create RAID in the BIOS
To create a RAID in the BIOS, you must first enter the BIOS. You can do this by pressing the "Del" key several times during the boot process. The following images describe how to create a simple RAID 5 array. Please note that with the onboard RAID controller on Supermicro X12 motherboards, only RAID 0, 1, 5, and 10 can be created.
-
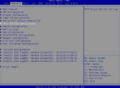 Use the arrow keys to navigate to the tab Advanced.
 -
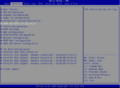 Use the arrow keys to navigate to SATA And RSTe Configuration access this menu by clicking on Enter.
 -
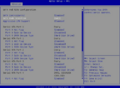 Select the SATA Mode Selection option and change the mode from AHCI to Intel RSTe Premium with Intel Optane System Acceleration.
 -
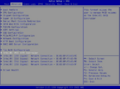 Navigate back to the tab Advanced. Here, the Intel(R) VROC SATA Controller is displayed. You can now configure this by pressing Enter.
 -
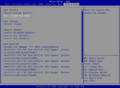 Now use the arrow keys to navigate to the Save & Exit tab and select Save Changes and Reset. This will save your changes and restart the system. Enter the BIOS again during the restart..
 -
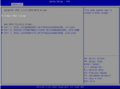 Navigate back to Advanced and select the onboard RAID controller. Here you will see the Create RAID Volume option, as well as the ports, names, and capacities of the connected storage devices. To create a RAID, select the Create RAID Volume option.
 -
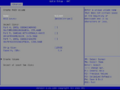 This menu is used to create the RAID. Enter the desired name in the Name field. Under RAID Level, select the desired RAID level. In the Select Disks submenu, you can select the disks that will be part of the RAID array. Strip Size specifies the block size. Under Capacity, you can select the capacity. However, this field is filled in automatically once you have selected the disks. Then select Create Volume to create the RAID.
 -
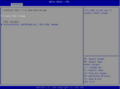 The RAID you created is now displayed under RAID Volumes.


Delete RAID
To delete a RAID, use the arrow keys to navigate back to the "Advanced" tab, then to the "Intel(R) VROC SATA Controller" subitem. Now press Enter to access the controller menu. Then select the RAID you want to delete and press Enter again.
-
Here, you can select the RAID you want to delete by clicking on Enter.
-
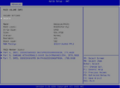 To delete the RAID, select the Delete option here.
 -
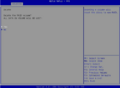 Confirm the deletion by selecting Yes. Please note that all data on the deleted storage device will be lost after deletion. Therefore, please delete the RAID only if you are certain that you no longer need the data.


RAID mode for parity RAID
The X12 series of Supermicro motherboards offers two different modes for configuring a RAID array with parity data. The explanation and configuration of the modes can be found in the following two paragraphs. An advantage provide, however, both modes: With parity-based RAIDs (in the case of onboard RAIDs on X12 motherboards, this is limited to RAID 5), data is not lost if a power outage and a RAID drive failure occur simultaneously.
Distributed PPL
In the Distributed PPL version, the so-called RAID Write Hole journal is stored on all disks in the RAID array. This provides full protection against the RAID write hole, but there is a performance degradation during write-intensive tasks. This kind of RAID can be easily created by selecting RAID 5 when creating the RAID and changing the RWH Policy from "Disable" to "Distributed PPL".
-
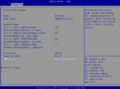 Here you can select the mode Distributed PPL.

Journaling Mode
In this variant, the RAID Write Hole journal is stored on an extra hard drive. This hard drive can only be used for this purpose. The data carrier is also not included in the RAID array. If you want to create a RAID 5 in Journaling Mode, instead of the usual three storage devices, four are required, since only the RAID Write Hole journal is stored on the fourth one. The performance degradation for write-intensive tasks depends on the performance of the storage device on which the RAID W/H journal is stored. However, the write speed is usually faster than in distributed mode. The journaling hard drive must be at least as large as the smallest hard drive in the RAID array.
-
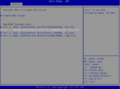 Select a hard drive on which the RAID W/H journal should be stored, and press Enter.
 -
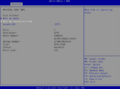 Navigate to Mark as Journaling Drive and press Enter. Confirm the message that appears by selecting Yes.
 -
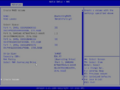 You can now create the RAID. Select RAID Level 5, then select the desired hard drives. You cannot select the hard drive marked as the journaling drive, as it is not part of the RAID array. Under RWH Policy, select Journaling Drive, and under Select RWH Journaling Drive, select the hard drive you previously designated as the journaling drive.


To stop configuring the hard drive as a spare drive, follow the steps described above, but this time select Reset to non-RAID instead of Mark as Spare and confirm by pressing Enter.
Administration
In the following, it is explained which options you have to administrate your Onboard RAID and how to remove hard drives from the RAID array.
Configuration spare plate
To administrate a RAID that has already been created, you have the opportunity to configure hard drives as spare plates. A spare plate is a hard drive, which is initially not in operation and takes over if a hard drive in the RAID array fails. The following series of images describes how this works.
-
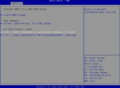 Select a desired hard drive to configure it as spare plate.
 -
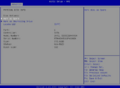 Select Mark as Spare.
 -
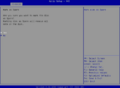 Confirm the designation of the spare plate with Yes.


The steps described must be performed that the hard drive is not configured as spare plate. However, select Reset to non-RAID instead of Mark as Spare and confirm with Enter.
Remove hard drives from RAID array
If you have too many hard drives in your RAID array and you want to delete one, perform the following steps. For this example, a RAID 5 array with 4 hard drives was created although 3 would be enough.
-
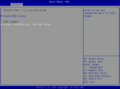 Select the RAID array from which you want to remove the hard drive.
 -
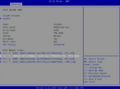 Select now the data carrier that should be removed from the RAID array.
 -
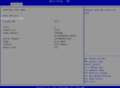 Select here the option Reset to non-RAID.
 -
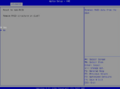 Confirm the removal by selecting Yes and pressing Enter.


After a hard drive has been removed, the RAID is in Degraded mode. This means that the RAID still functions but no longer in optimal condition. Normally, this mode occurs, when the hard drive fails unexpectedly. In this case, it is recommended to change it and to start a rebuild.
-
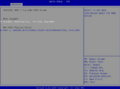 Select the RAID, in which you want to start the rebuild.
 -
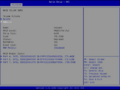 Select the option Rebuild.
 -
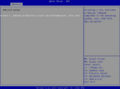 Select the hard drive with which you want to start the rebuild.
 -
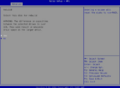 Confirm with Yes, to start the rebuild.


Change RWH policy
The above described RWH Policy can also be changed afterwards. To do this, go back to the Controller BIOS and select the desired RAID. Next, select the desired mode under the RWH Policy option.
-
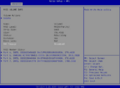 Here, you can change the desired mode.

 |
Translator: Alina Ranzinger Alina has been working at Thomas-Krenn.AG since 2024. After her training as multilingual business assistant, she got her job as assistant of the Product Management and is responsible for the translation of texts and for the organisation of the department.
|