
Migrate vSphere (ESXi) Installation to a new Storage Device
With the release of vSphere 7.0 Update 3, VMware announced that after the ESXi 7.x releases, the installation of the hypervisor on a USB stick or SD cards will no longer be supported.[1] Although no other storage medium is yet required for the current versions, it is important to plan accordingly for the upcoming ESXi releases. In this article, we explain the upcoming requirements and show different approaches to migrate the installation.
Requirements to the boot data medium
In KB article 85685[2] VMware describes the requirements for the data storage of future versions. It is recommended to store the OS data on a new disk. In many cases, it is a good idea to install a new M.2 SSD, since it can be installed without much effort. However, a new 2.5" SAS or SATA SSD, SATADOM or even a PCIe NVMe can also be used without hesitation.
To ensure many years of high-performance and stable operation, the selected memory type must meet the following minimum requirements:
- 32GB memory space - 128GB is recommended.
- Lifetime of 138 TBW
- Sequential write speed of 100MB/s
- Sequenzielle Schreibgeschwindigkeit von 100MB/s
Our Sales team will be happy to advise you which storage solutions are suitable for your Thomas-Krenn.AG server.
Migration by Backup & Restore
The easiest way to move the ESXi installation to a new disk is by backing up the host configuration and then restoring it.
-
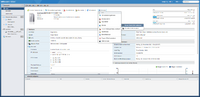 1. To create the backup of the configuration you need to enable SSH or the console shell.
 -
 2. The command bin/firmwareConfig.py --backup /tmp creates a backup in the /tmp folder. The backup can now be downloaded with e.g. WinSCP.
 -
 3. Remove the old storage media and install the same vSphere version on the new media.
 -
 4. Enable SSH or console shell and upload the backup. With bin/firmwareConfig.py --restore /tmp/*configBackup* the configuration of the host is loaded. Finally, the server restarts once automatically.


Note: For ESXi versions 6.7 and earlier, the command is firmwareConfig.sh
Replace boot disk using Clonezilla
If there are signs that the boot disk is about to fail, cloning can be used to move the installation to a new disk of the same size. In this article, CloneZilla is used because it is based on a live OS and thus the cloning process can be performed directly on the host. Of course, programs such as Acronis True Image can be used if you connect the storage media to a suitable PC.
| Cloning a disk can lead to data loss if done incorrectly. We therefore advise you to create a backup of the host configuration and data beforehand. |
|---|
Note: Do not use this procedure when upgrading from a small storage medium, such as a USB stick, to a larger SSD. During cloning, the partition table of the old disk is copied 1:1. The VMFSL partition, where the ESX-OSData is stored, cannot be extended afterwards.
-
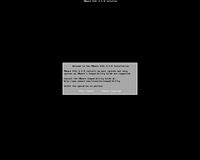
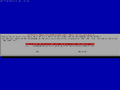
 1. Boot menu of Clonezilla.
 -
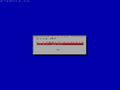
 2. Choose Language.
 -
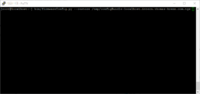
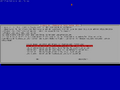
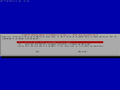
 3. If necessary, the keyboard layout can be changed, but it is not relevant for the further process.
 -
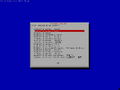
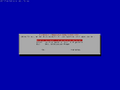
 4. Choose "device-device" mode.
 -
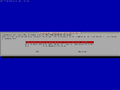
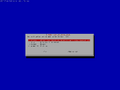
 5. Choose Beginner.
 -
 6. Choose "disk_to_local_disk" to copy the whole contents of the flash drive.
 -
 7. Choose Source.
 -
 8. Choose Destination.
 -
 9. The file system check can be skipped.
 -
 10. Select action after copying is complete.
 -
 11. Continue with "Enter". The action must be confirmed twice more with "y".
 -
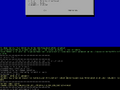
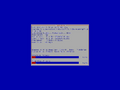 12. Clonezilla will now start copying all partitions.
 -
 13. Remove the original disk before starting, otherwise a PSOD will occur.
.png)
.png)
.png)
.png)
.png)
.png)
.png)
.png)
.png)
.png)
.png)
.png)
.jpg)
References
- ↑ vSphere 7 U3: SD-Karten und USB-Sticks eignen sich nicht mehr als Boot-Medien (heise.de, 30.09.2021)
- ↑ SD card/USB boot device revised guidance (85685) (kb.vmware.com)
Author: Florian Sebald