
Instructions on the rack assemly of a Thomas-Krenn server
This article leads you through the process of the montage of a Thomas-Krenn server in a rack. Tools are only needed for certain steps.
Application purpose
These instructions are applicable on the following 2HE systems of Thomas-Krenn:
- AzSHCI RI2224 v5
- AzSHCI RI2212 v5
- AzSHCI RA2224 v4
- AzSHCI RA2212 v4
Requirements
The Thomas-Krenn 2HE server offer a robust and performant solution for different computing requirements. When planning the rack installation, it is important to consider the exact dimensions of the server and the flexibility of the rack spacing.
The server length of a 2HE server is 81 cm, while the total length including the rails is 89 cm. This guarantees a suitable fit within the rack and offers enough space for the assembly and maintenance of the server.
In terms of rack spacing, this can be variable and ranges from a minimum of 65 cm to a maximum of 92 cm in length. This length enables to install the Thomas-Krenn 2HE server in different rack configurations, depending on the specific requirements of the data center or server room.
-
 The lenght of the server is 81 cm.
 -
 The lenght of the server, with trails, is 89 cm.
 -
 The maximal distance of the rack can be 92 cm.
 -
 The distance of the rack must be 65 cm minimum.


Instructions
In the following, the montage is explained step by step. With those easy steps, you can install your Thomas-Krenn server quickly and without problems. The included rails and the minimal use of tools make the process efficient and user friendly so that you can put your sever in operation as fast as possible.
Fixing of inner rails
In the beginning, you have to fix the inner rails directly on the server. Please make sure that the rails are duly aligned and that they are safe on the intended mounting points of the server. This ensures a stable base for later installation in the rack.
Fixing of outer rails
Next, attach the outer rails directly to the rack. Position the rails according to the mounting points in the rack and ensure that they are firmly and securely fastened. The outer rails serve as a guide for the server during installation and provide additional stability during operation.
Sliding the server into the rack
As soon as the inner rails are assembled on the server and the outer rails in the rack, you can slide the server into the rack. Please make sure that the server slides evenly and securely on the rails and carefully slide it into the desired position in the rack.
-
 Scan of the enclosed instructions.
 -
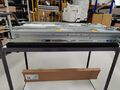
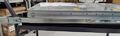
 The rails unpacked and lying on the chassis.
 -
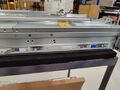
 One of the rails attached to the server side.
 -
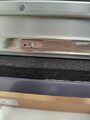
 Detailed view of the rail on the server.
 -
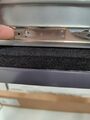
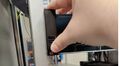
 This tab must be lifted to remove the rail from the server again.
 -
 Lifting of the tab.
 -
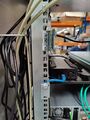 Front view of the rail in the rack.
 -
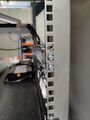 Back view of the rail in the rack.
 -
 This is how the rail must be oriented in the rack for installation.
 -
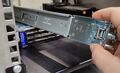
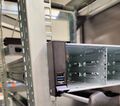
 Insert the server into the rail.
 -
 This screw can be used to secure the server in the rack so that it cannot be pulled out.
 -
 Screwing the server into the rack.
 -
 The blue and white levers must be actuated to push in/pull out the server.


.jpg)
.jpg)

 |
Author: Leo Dirr Leo Dirr joined Thomas-Krenn in 2018 to work in technical support. At the moment Leo is specializing in Windows Server, Software-Defined technologies and networking.
|
 |
Translator: Alina Ranzinger Alina has been working at Thomas-Krenn.AG since 2024. After her training as multilingual business assistant, she got her job as assistant of the Product Management and is responsible for the translation of texts and for the organisation of the department.
|