
Installation of RAID 10 with Broadcom LSA Storage Manager
In this article, you will find the instructions for the creation of a RAID 10 with a Broadcom RAID-Controller in the Storage Manager LSA (LSI Storage Authority).
Creation
In the following gallery, the installation of a RAID 10 in LSA is explained step by step. Please note that the LSA must already be installed in order to perform the setup.
-
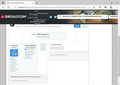
 Step 1: First, you have to register to LSA. Click on "Sign in" to register.
 -
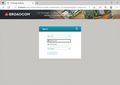 Step 2: After you have clicked on "Sign in", you will be forwarded to the register screen. There, you have to enter the windows user name and password.
 -
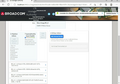
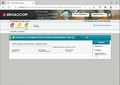 Step 3: Next, you will be forwarded to the homepage of the LSA.
 -
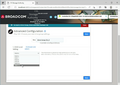
 Step 4: Here you have to click on "Configure" and select the subitem "Advanced Configuration"
 -
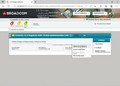
 Step 5: Select on this page the desired RAID-level, in our case RAID 10. Confirm your selection with "Next".
 -
 Step 6: Now, the used hard disks must be selected. Select Add Physical Drives for this.
 -
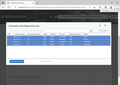 Step 7: Select the data carrier for the RAID-composite and confirm your selection with Add Physical Drives.
 -
 Step 8: LSA automatically creates up to 16 virtual disks from the RAID 10 array, which are presented to the operating system. Use Add Virtual Drives to configure the number and options of the virtual disks.
 -
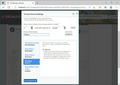 Step 9: Configure the Virtual Drive Settings in the settings for the virtual disks. The options are explained in this article. Confirm your settings with Add Virtual Drives.
 -
 Step 10: To conclude the creation of the RAIDs, click on Finish.
 -
 Step 11: You will now be redirected back to the home page. Here you can manage and delete the RAID.


Virtual drive settings
When setting up RAID 10 with the LSA, you will need to configure settings for virtual disks. These settings are explained here.
Initialization state
This setting erases the hard drives to initialize the RAID after confirming the creation of the RAID by clicking the “Finish” button (see step 10).[1]

- No Initialization: Nothing will be deleted.
- Fast Initialization: The first and last 8 MB of the data carriers are deleted to remove the Master Boot Record.
- Full Initialization: The hard disks are completely deleted.
Read Policy
With this setting, the RAID controller requests not only the actual data requested on the hard disk, but also the additional information located next to it. This “anticipated” data is temporarily stored in the cache.

- No Read Ahead: Switch off this function
- Read Ahead: Switch on this function
Write Policy
These settings state which writing strategy of the controller is used.

- Write Trough: The data is written simultaneously to the cache and the corresponding main memory location.
- Write Back: Depends on the status of the controller's battery pack. If the battery is low, the controller automatically switches to write-through mode to prevent data loss in the event of a possible power failure.
- Always Write Back: In write-back mode, the RAID controller acknowledges I/O requests immediately after the data has been loaded into the controller's cache.
IO Policy
These settings cause that read accesses are not taken exclusively from the controller's cache memory. During a read instruction, the data is transferred simultaneously to the controller cache and the operating system. These settings can not be changed in this example, as the RAID-controller does not support the "Cached IO" function.

Drive Write Cache policy
These settings create a hard disk cache that improve the writing and reading times.

- Default: the current settings remain unchanged
- Enable: a hard disk cache is created
- Disable: no hard disk cache is created
References
- ↑ LSA Manual(www.thomas-krenn.com, pdf)
 |
Author: Harald Peterhansl Harald Peterhansl has been working at Thomas-Krenn.AG since 2022. As an employee in the Hardware Service department, he is responsible for setting up test environments, testing a wide range of server components, and repairing defective customer systems.
|
 |
Translator: Alina Ranzinger Alina has been working at Thomas-Krenn.AG since 2024. After her training as multilingual business assistant, she got her job as assistant of the Product Management and is responsible for the translation of texts and for the organisation of the department.
|