Install and configure NSClient++ under Windows
NSClient++ offers a convenient way to monitor Windows systems. Via NRPE or predefined check_nt commands, a Windows host is connected to an existing monitoring solution. This article describes how a Windows system can be prepared with NSClient++ and integrated into Icinga.
Installation
Msi installers are offered for installing NSClient++.
- Download the msi installation assistants for the NSCP service:
http://files.nsclient.org/stable/NSCP-0.4.1.101-x64.msi
- The following image gallery shows a typical installation
- Notes:
- In step two, "Allow all users to write config file" can also be activated in order to edit configuration files as a normal user.
- In step three, the IP address ("Allowed hosts") that will be allowed to connect with NSCP should be entered. This is typically the IP of the Icinga server.
- Step three also offers the possibility of setting a password for the check_nt plugin.
- Notes:
Debug Mode
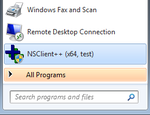
NSClient++ can be started in debug mode via the Start menu (see image right) or with the command nscp test.
A test from the Icinga server shows whether network communication is functioning (NSCP must be started on the Windows host):
:~$ telnet 10.0.0.3 12489
Trying 10.0.0.3...
Connected to 10.0.0.3.
Escape character is '^]'.
On the Windows machine, the debug mode NSCP shows the connection from 10.0.0.1:
C:\Program Files\NSClient++>nscp.exe test
d vice\logger_impl.cpp:420  Creating logger: console
[...]
d r\NSClientServer.cpp:139  Allowed hosts definition: 10.0.0.1(255.255.255.255)
d de\socket/server.hpp:126  Binding to: [::]:12489(ipv6)
d de\socket/server.hpp:162  Attempting to bind to: :12489
d de\socket/server.hpp:121  Binding to: 0.0.0.0:12489(ipv4)
d de\socket/server.hpp:162  Attempting to bind to: :12489
d rvice\NSClient++.cpp:616  NSClient++ - 0,4,1,101 2013-05-18 Started!
l ce\simple_client.hpp:32   Enter command to inject or exit to terminate...
d /server/protocol.hpp:59   Accepting connection from: 10.0.0.1
Testing Plugins
Some plugins come with NSClient++. These can be run via NRPE or check_nt.
check_nrpe
The preferred monitoring type for a Windows host is, as with other systems, NRPE. For the activation of NRPE with arguments, the following text is added to the file C:\Program Files\NSClient++\nsclient.ini:
; Section for NRPE (NRPEServer.dll) (check_nrpe) protocol options.
[/settings/NRPE/server]

; COMMAND ARGUMENT PROCESSING - This option determines whether or not we will allow clients to specify arguments to commands that are executed.
allow arguments = true
Upon restarting the NSCP service, arguments over NRPE are now accepted:[1]
:~$ /usr/lib/nagios/plugins/check_nrpe -H 10.0.0.3 -p 5666 -c CheckVersion
0,4,1,101 2013-05-18
:~$ /usr/lib/nagios/plugins/check_nrpe -H 10.0.0.3 -p 5666 -c CheckServiceState -a Server
OK: All services are in their appropriate state.
:~$ /usr/lib/nagios/plugins/check_nrpe -H 10.0.0.3 -p 5666 -c CheckCPU -a warn=80% crit=95% time=5m ShowAll=long
OK: 5m: average load 0%|'5m'=0%;80;95
check_nt
check_nt has predefined aliases in the "nsclient.ini" file, with which a Windows host is monitored. The checkt_nt[2] script tests the plugins of the Windows host (10.0.0.3) from the Icinga server (10.0.0.1):
:~$ /usr/lib/nagios/plugins/check_nt -H 10.0.0.3 -p 12489 -v CLIENTVERSION
NSClient++ 0,4,1,101 2013-05-18
References
- ↑ Series on nsclient Part 3 (blog.netways.de)
- ↑ check_nt (nagios-wiki.de)
Author: Georg Schönberger


