
Windows XP Installation in VirtualBox
This article will show the installation of Windows XP on a VirtualBox 3.0.4 guest system. VirtualBox 3.0.4 will run on a laptop under Linux with Fedora 11 in this example. The Open Source Edition (OSE) of VirtualBox will be used for this.
Creating Virtual Machines
The creation of a new machine will be started in VirtualBox using the menu items Machine -> New.
-
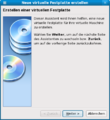
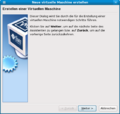 Step 1: creating a virtual machine
 -
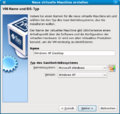 Step 2: virtual machine name and OS type
 -
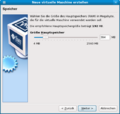 Step 3: Storage
 -
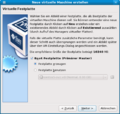 Step 4: virtual hard disk
 -
 Step 5: creating a virtual hard disk
 -
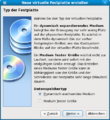 Step 6: type of hard disk
 -
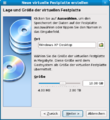 Step 7: position and size of the virtual hard disk
 -
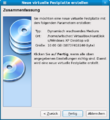 Step 8: summary (virtual hard disk)
 -
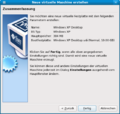 Step 9: summary (virtual machine)
 -
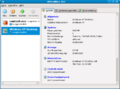 Step 10: the virtual machine has be created
 -
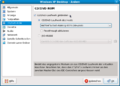 Step 11: adding a CD drive


Installing Windows XP on the virtual Machine
The virtual machine now exists. Thus, Windows XP can be installed on it:
-
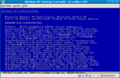
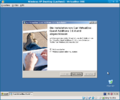
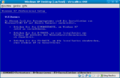 Step 12: starting Windows XP Professional Setup
 -
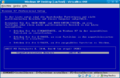
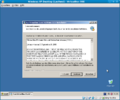
 Step 13: the Windows XP license
 -
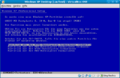
 Step 14: selecting a partition
 -
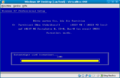
 Step 15: formatting the partition (select NTFS (quick format) so that the dynamic virtual hard disk will not be bloated)
 -
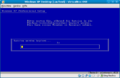
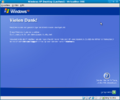
 Step 16: Formatting progress
 -
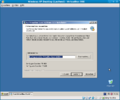
 Step 17: Copy progress
 -
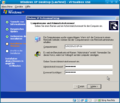
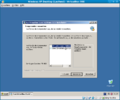
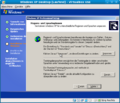 Step 18: regional and language options
 -
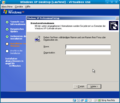 Step 19: user information
 -
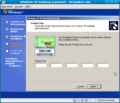 Step 20: Product key
 -
 Step 21: computer name and administrator password
 -
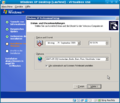 Step 22: date and time settings
 -
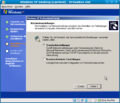 Step 23: network settings
 -
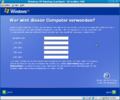
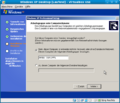 Step 24: workgroup or computer domain
 -
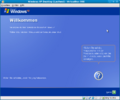 Step 25: setting up Windows XP
 -
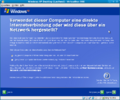 Step 26: selecting the Internet connection
 -
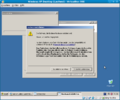
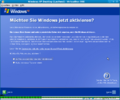 Step 27: activating Windows XP
 -
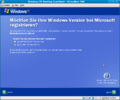 Step 28: registering Windows XP (optional)
 -
 Step 29: creating users
 -
 Step 30: setup completed


Installing Guest Additions
After the installation of Windows XP has been completed, the VirtualBox guest additions can be installed. These extensions include special drivers for increasing performance.
License: The guest additions do not fall under the GPL like VirtualBox OSE. A commercial license is required for the commercial use of the guest additions.[1]
Note: When the VirtualBox version has been updated on the host, the guest additions should also be updated on the guest system. To do this, you will simply re-install the guest additions after VirtualBox has been successfully updated. De-installation of the prior version of the guest additions is not required.
-
 Step 31: installing the guest additions
 -
 Step 32: downloading the CD-ROM image
 -
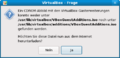
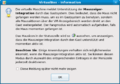
 Step 33: confirming the download
 -
 Step 34: integrating the CD-ROM image
 -
 Step 35: starting the installation of the guest additions
 -
 Step 36: the guest additions license
 -
 Step 37: target directory for the guest additions
 -
 Step 38: guest additions components
 -
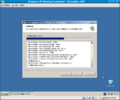 Step 39: the guest additions are running
 -
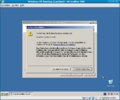 Step 40: continuing the installation of the guest additions
 -
 Step 41: continuing the installation of the guest additions
 -
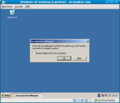
 Step 42: re-starting Windows XP
 -
 Step 43: integrating the mouse pointer
 -
 Step 44: automatically correcting the screen resolution


References
 |
Author: Werner Fischer Werner Fischer, working in the Knowledge Transfer team at Thomas-Krenn, completed his studies of Computer and Media Security at FH Hagenberg in Austria. He is a regular speaker at many conferences like LinuxTag, OSMC, OSDC, LinuxCon, and author for various IT magazines. In his spare time he enjoys playing the piano and training for a good result at the annual Linz marathon relay.
|