
Secure SSH login with 2 factor authentication
A SSH shell belongs to the essential management tools on Linux based servers. This shell is already well covered by using certificate based login methods only and by deactivating root logins. Furthermore, an additional registration step can be added, for example a one-time password, with a second factor. This further enhances security, as a successful login now relies on something you have (the certificate) and something you know (the one-time password). This article shows how to secure the SSH login with Google Authenticator as second factor on an Ubuntu Server 18.04 LTS.
Preparatory measures
First, configure certificate-based authentication on your Ubuntu Server 18.04 LTS system using a OpenSSH Public Key.
libpam-google-authenticator
The following paragraph provides an insight into the Google Authenticator PAM-module and shows the installation and configuration.
Integration
The two-factor authentication is connected as PAM module ((Pluggable Authentication Module) to the operating system.
Installation
The installation of the PAM module from Google Authenticator can be made on Debian and Ubuntu via apt. It is contained in the official package sources.
$ sudo apt install libpam-google-authenticator
Compatibility
The authentication via PAM module is compatible with a variety of system services. A lot of steps can therefore be further secured using Google Authenticator. The list command applied to the /etc/pam.d/ directory returns the services and tools currently supported in a base installation of Ubuntu 18.04 LTS Server.
$ ls -m /etc/pam.d/
atd, chfn, chpasswd, chsh, common-account, common-auth, common-password,
common-session, common-session-noninteractive, cron, login, newusers, other,
passwd, polkit-1, runuser, runuser-l, sshd, su, sudo, systemd-user, vmtoolsd
Configuration
After the PAM module has been installed, it can be presented, initialized and configured as follows:
- Execute Google Authenticator on the console:
- $ google-authenticator
- Do you want authentication tokens to be time-based (y/n)
- y, this is used to generate TOTP tokens (time-based one-time password)
- n, this generates HOTP tokens (counter-based one-time passwords)
- In this case, the TOTP method is used
- Now, a QR-code is displayed on the SSH-console
- Scan this code with a compatible app on your smartphone
- Copy and store the keys listed below safely.
- With the emergency scratch codes, the login can be performed without OTP
- Update the .google_authenticator file with this information.
- For this, type y.
- Confirm all other questions with y or with n if you want to use different settings.
Integration into SSH-login
The Google Authenticator PAM module is fully configured. Now, these services, such as the SSH daemon, can be adjusted to enable a two-factor authentication through it.
Important hint: If the following configuration is made via SSH session, be sure to keep the current session open and test it in parallel with a second session. If the SSH daemon is misconfigured, you will no longer be able to log in.
Adjustments in /etc/pam.d/sshd
Open the /etc/pam.d/sshd file with an editor. Comment out the line @include common-auth and add the line for Google Authenticator below it. Store and close the file afterwards.
[...]
# Standard Un*x authentication.
#@include common-auth
[...]
# Google Authenticator
auth required pam_google_authenticator.so
Adjust sshd_config
In the configuration file /etc/ssh/sshd_config, you can now set ChallengeResponseAuthentication to yes.
[...]
# Change to yes to enable challenge-response passwords (beware issues with
# some PAM modules and threads)
ChallengeResponseAuthentication yes
[...]
Also, check that UsePAM is set to yes and add the following line below it: AuthenticationMethods. In this example, an authentication is accepted via public key and one-time password.[1]
[...]
UsePAM yes
AuthenticationMethods publickey,keyboard-interactive
[...]
Restart SSH daemon
Now, you can restart the SSH daemon to activate the configuration.
$ sudo systemctl restart sshd.service
Login process
The following screenshots show the login process of an SSH shell with activated two-factor authentication by Google Authenticator.
-
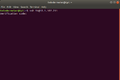 Start the SSH session. You will now be asked for the time-based one-time password. Open your app and enter the six-digit numeric code.
 -
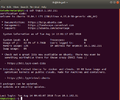 After entering TOTP, the login is made on the Ubuntu server 18.04 LTS system.


References
- ↑ sshd_config — OpenSSH SSH daemon configuration file (manpages.ubuntu.com)
 |
Author: Thomas Niedermeier Thomas Niedermeier working in the product management team at Thomas-Krenn, completed his bachelor's degree in business informatics at the Deggendorf University of Applied Sciences. Since 2013 Thomas is employed at Thomas-Krenn and takes care of OPNsense firewalls, the Thomas-Krenn-Wiki and firmware security updates.
|
 |
Translator: Alina Ranzinger Alina has been working at Thomas-Krenn.AG since 2024. After her training as multilingual business assistant, she got her job as assistant of the Product Management and is responsible for the translation of texts and for the organisation of the department.
|