
Installation of a Supermicro IPMI license
This article is about the installation of a Supermicro IPMI license. The activation of a Supermicro IPMI license is made via Web GUI des IPMI. To activate the license successfully, the following steps must be performed.
Activation of license on elder mainboards with old Web-GUI
The legacy GUI is implemented on Supermicro motherboards of the X11/H11 series and older:
-
 Enter the IP address of the IPMI Web GUI in the browser and log in with your login data.
 -
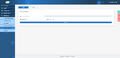
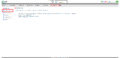 Click on the Miscellaneous tab at the top of the GUI. You will then find the entry for the IPMI license in the left tab under the Activate License option.
 -
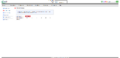 Enter your license key here. As soon as you have entered. As soon as you have entered the key successfully, the display switches from Not Activated to Activated.


Activation of IPMI-license on newer mainboards with new Web-GUI
The new GUI is impemented in the new generation (from X12/H12) of Supermicro mainboards:
-
 Enter the IP address of the Web-GUI in the browser and log in with your login data.
 -
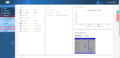 Click on Maintenance and navigate to the tab License Activation.
 -
 Open the software license key file (.txt) received from Supermicro, delete all MAC addresses and semicolons, and save each key in a separate .txt file. Please note that blank spaces are not allowed in the text file.
 -
 Click on Select File, choose the text file with the license key and click on Upload. The message with Success appears if the upload was successful. When the upload is successful, a message saying “Success” will appear.


 |
Translator: Alina Ranzinger Alina has been working at Thomas-Krenn.AG since 2024. After her training as multilingual business assistant, she got her job as assistant of the Product Management and is responsible for the translation of texts and for the organisation of the department.
|