
Install FreeNAS
Installing FreeNAS is straightforward and takes only a few steps. Further configuration after installation is then carried out via the integrated web interface. This article shows the Installation and other basic configuration of FreeNAS in version 11.1-U4.
Download FreeNAS
An installation medium from FreeNAS can be downloaded as ISO image and used to create a bootable USB flash drive, for example. Transfer it to the USB stick under Linux/BSD/MacOS with dd or via physdiskwrite under Windows. Under Linux, for example, execute the following commands (use the device name of your USB stick instead of /dev/sdX):[1]
sudo dd if=FreeNAS-11.1-U1.iso of=/dev/sdX bs=64k
sync
Installation
The following section shows the installation of FreeNAS.
Installing from an installation medium
For installation, for example, boot from the previously created USB stick.
-
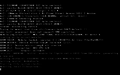
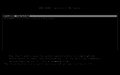 The Grub Bootloader is displayed, start the installation with the Enter key.
 -
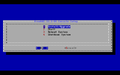 The FreeNAS Console setup is displayed, select the first menu item Install/Upgrade and confirm with Enter.
 -
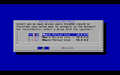 Select the installation location, please make sure there is sufficient storage space.
 -
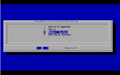
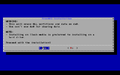 Check the installation location and confirm with Yes. The selected disk is formatted and FreeNAS installed on it.
 -
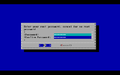 Create a secure root password and confirm by clicking on OK.
 -
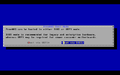 FreeNAS can be installed in BIOS or UEFI mode. In this case, a BIOS installation is executed.
 -
 The installation of FreeNAS begins.
 -
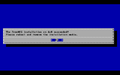 After a few moments the basic installation is completed.


Restart after installation
The installation media can now be removed and the newly installed FreeNAS system can be restarted. The following screenshots show the steps after the reboot until the FreeNAS console is displayed.
-
 Restart the system and remove the installation media.
 -
 FreeNAS is started.
 -
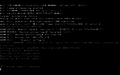 The start process is running.
 -
 The network configuration is complete, by default an address is configured via DHCP.
 -
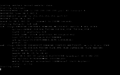
 The Diffie Hellmann parameters are generated. This takes a few minutes.
 -
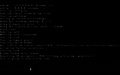
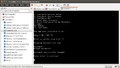
 The initial start after the installation is now complete and the console menu is displayed. Now the further configuration in the FreeNAS can be done by a browser in the web interface. To do this, call up the displayed IP address in a browser of your choice.


Configuration
Initial configuration after a new installation is easy with the integrated wizard. The following screenshots show an exemplary initial configuration.
-
 The login screen is displayed after a successful system startup. You will find the IP of the system listed on local console.
 -
 Log on with the configured root user and corresponding password.
 -
 The "Initial Wizard" is displayed, set the language, keyboard settings and time zone.
 -
 A volume is created on the available disks.
 -
 In this case, a volume "storage" is created with automatic settings on the two available hard disks.
 -
 An Active Directory can be defined.
 -
 A network share can be created with the usual protocols.
 -
 The notification functions can be configured.
 -
 Confirm the initial configuration.
 -
 The volume is created.
 -
 The services are restarted.
 -
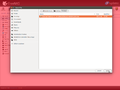
 The initial configuration is done and you end up in the System area of the web interface.


Backing Up and Restoring the Configuration
In the web interface of FreeNAS the configuration can be downloaded as an archive. This can reduce the configuration effort for a new installation. An existing backup can also be easily imported.
Save configuration
The existing configuration can be easily saved via the FreeNAS web interface.
-
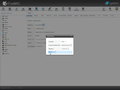
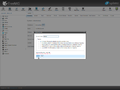
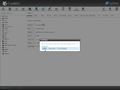
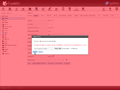
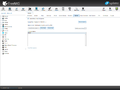
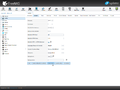 In the menu System go to the tab General and click the button Save Config to save the configuration.
 -
 Activate the checkbox to also save hash values of the passwords.


Restore configuration
The screenshots below show how to restore a backed up configuration.
-
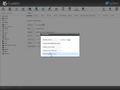
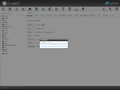
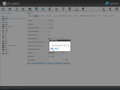
 Restoring the configuration is started with the button Upload Config. This is also located in the General tab of the System menu.
 -
 Click on Choose File.
 -
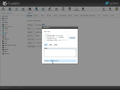
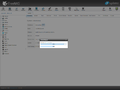
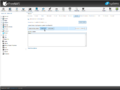
 Select the appropriate file.
 -
 Click on Update to upload the configuration.
 -
 The system is then restarted.
 -
 Reset the root password via the local console by entering: "11 - <new password> - ENTER - <new password repeat> - ENTER".


Update
FreeNAS can easily be kept up to date via the web interface. The built-in update function can be found under the menu item System in the tab Update. The system can be updated manually using the downloaded update archive or the integrated update function. It is more convenient to use the integrated update function. FreeNAS can automatically check for available updates by setting the appropriate update branch. It is recommended to stay on the "stable" branch in production environments. For test environments Nightly versions can be used if you want to test new features in advance.
Manual Update
You can update manually via update file by downloading the corresponding file *-manual-update.tar.
Automatic Update
The following screenshots show the function of the integrated update function of FreeNAS. The update from FreeNAS 11.1-U1 to 11.1-U3 is shown here.
-
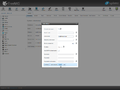
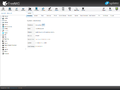
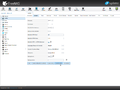
 In the menu System switch to the tab Update.
 -
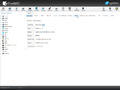
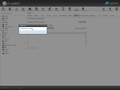
 The Update menu is displayed.
 -
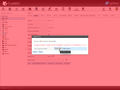
 Click on Check Now.
 -
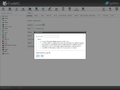
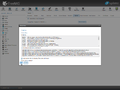 The changelog of the new version is displayed, click on OK.
 -
 The download of the update packages begins.
 -
 The operating system is downloading.
 -
 The new FreeNAS version is installed.
 -
 The update is complete.


 |
Author: Thomas Niedermeier Thomas Niedermeier working in the product management team at Thomas-Krenn, completed his bachelor's degree in business informatics at the Deggendorf University of Applied Sciences. Since 2013 Thomas is employed at Thomas-Krenn and takes care of OPNsense firewalls, the Thomas-Krenn-Wiki and firmware security updates.
|
- ↑ On FreeBSD or Linux (doc.freenas.org)