Console based Huawei Mini PCIe modem 4G connection with LES v3 under Debian
| Please note that this article / this category refers either on older software / hardware components or is no longer maintained for other reasons. This page is no longer updated and is purely for reference purposes still here in the archive available. |
|---|
This article describes the hardware and software installation of a Huawei ME909u-521 Mini PCIe 4G modem under Debian GNU/Linux on a Thomas-Krenn LES v3 system. In this example, the command line based connection using a Deutsche Telekom SIM card is described under Debian GNU/Linux. For a graphical installation in a desktop environment, the easy-to-configure network manager is recommended.
Test setup
The following components have been used in this manual:
- Debian Linux 9.6 x64 (Codename stretch)
- No desktop environment
- Kernel version: Linux debian 4.9.0-8-amd64 #1 SMP Debian 4.9.130-2 (2018-10-27) x86_64 GNU/Linux
- Huawei 4G module ME909u-521 Mini PCIe
- Thomas-Krenn Product not available anymore
- 8GB DDR3
- 480 GB Samsung SM863 SSD
- Deutsche Telekom SIM settings
- APN: internet.t-d1.de
- Username: TM
- Password: TM
Preparation
Switch off the power to the device. Use appropriate ESD work utensils to prevent damage to the hardware from static charges.
The following steps are performed in this example:
- A Deutsche Telekom SIM card applied in SIM slot of the LES v3
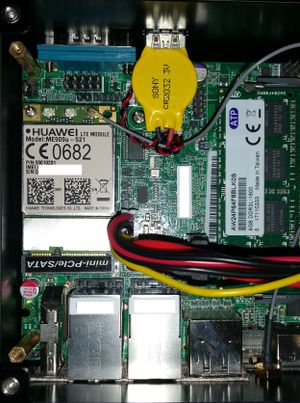
- Mini PCIe Huawei card inserted in Mini PCIe/SATA slot
- 4G antenna internally connected (U.FL)
- DDR-RAM re-installed after removal
Installation
The following section shows the installation of the modem, the required software and the configuration steps.
Hardware installation
Now the software installation of the Mini PCIe card takes place.
Hints:
- The SIM card slot is located under the RAM slot of the LES v3.
- To use 2 LTE antennas for better transmit/receive power, connect them to M(ain) and A(uxillary) via the U.FL connectors on the Huawei card.
- Operation with only one antenna is possible using only the M(ain) connector (see figure above).
Check card installation
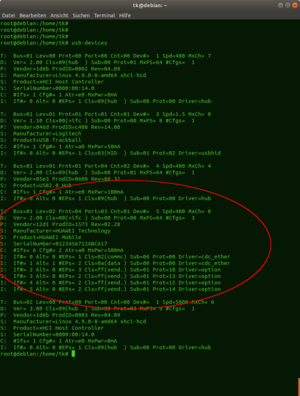
After the card is installed in the Mini PCIe slot, it is managed by the system exclusively as a USB device. To check whether the card has been successfully recognized by the operating system, execute the following command:
$ usb-devices
For detailed output, use the following command:
$ dmesg | grep usb
Install required packages
To use the 4G card successfully the following packages have to be installed:
- ppp (Point to point protocol necessary for the use of the 4G card)
- netbase (usually included with the basic installation)
- ifupdown (usually included with the basic installation)
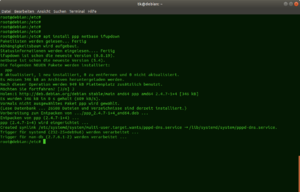
Installation of the packages:
$ apt install ppp netbase ifupdown
Creating the configuration files
To set up the board ready for operation, a configuration file must be created under /etc/ppp/peers/. Please make sure that the correct APN is selected according to the booked mobile tariff.
Creating a sample configuration:
$ nano /etc/ppp/peers/myconnection
Contents of the sample configuration:
#Set Username
user "YOUR_USERNAME"
#Set APN
connect "/usr/sbin/chat -v -f /etc/chatscripts/gprs -T internet.t-d1.de"
#Set Serial Interface for Huawei Card
/dev/ttyUSB0
#Other Settings
noipdefault
defaultroute
replacedefaultroute
hide-password
noauth
persist
usepeerdns
Configuring the PAP/CHAP secrets
To transfer username and password, the CHAP/PAP Secrets (credentials) have to be defined:
$ nano /etc/ppp/pap-secrets
Add the following entries at the end of the file:
#Syntax =  "username" * "password"
#Here in the example carrier Deutsche Telekom
"TM" * "TM"
Add this entry to chap-secrets as well:
$ nano /etc/ppp/chap-secrets
Add the following entries at the end of the file:
#Syntax =  "username" * "password"
#Here in the example carrier Deutsche Telekom
"TM" * "TM"
Editing the network configuration
To make the settings known, a new connection must be entered in /etc/network/interfaces.
$ nano /etc/network/interfaces
Add a new connection using the ppp interface:
auto myconnection
iface myconnection inet ppp
provider myconnection
The configuration of the connection is now complete. The connection is persistent and the configuration remains after a restart. Now you can test the PPP configuration with the command ifup:
$ ifup myconnection
Troubleshooting
If the interface ppp0 is listed in the network interfaces, but has not yet been assigned an IP address, this could be due to a missing or bad mobile phone connection. Another reason could be an incorrect APN.
Card operational
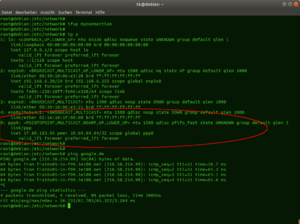
The following screenshot shows the proper function of the registered 4G card.
Display the network configuration:
$ ip a
|
Author: Wilfried Seifert Wilfried Seifert, working in the Systems Engineering department at Thomas-Krenn, is responsible for system/prototype development in his work area. LPIC 3 certified, deals with construction / programming of embedded / GPIO systems; in his spare time he likes to repair old home computers, attends Linux conferences or is on the road with his bike (MTB) for sporting compensation.
|


